Internet Information Services
Install the SMTP server feature
- Open the Server Manager and select Add roles and features.
- Click Next and select the Role-based or feature-based installation option.
- Click Next again and select the server on which to install the SMTP relay. Click Next until you reach the Features page.
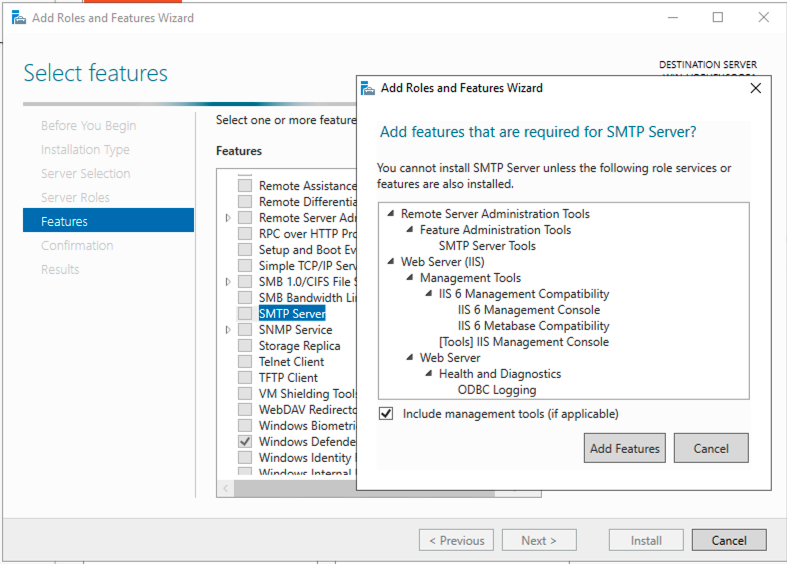
- Select the SMTP Server feature. Click Add Features to install the required dependencies
- Click Next until you get to the Confirmation page and review the installation summary. Click Install to begin the installation.
- Once the installation is complete, click Close.
Configure the SMTP relay
In the Start menu, under Windows Administrative Tools, open Internet Information Services (IIS) 6.0 Manager
- Select your server. Right-click on the SMTP virtual server and select Properties.
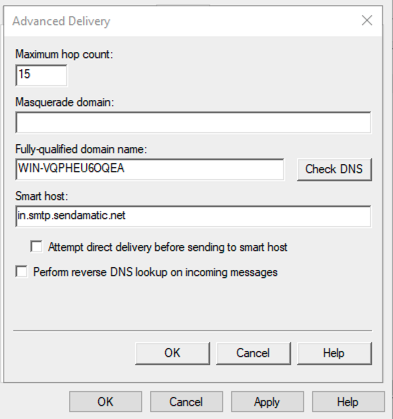
- Select the Delivery tab, and click Advanced
- Enter
in.smtp.sendamatic.netin the Smart host field, and click OK - Click Outbound Security
- Select Basic Authentication, and add the mail credentials you created from the Sendamatic console.
- Ensure that TLS encryption is checked, and click OK
Allow connections to the SMTP relay
In the Access tab, click Relay
Click Add, and enter the IP address or hostname of the server that will be sending emails through the IIS SMTP relay.
-
Click OK and then click Apply to save the changes.
-
Click OK to close the SMTP Virtual Server Properties window.
Test the relay
The SMTP relay is now configured and ready to use. You can test the configuration by sending an email using the SMTP relay.
Send-MailMessage -From "[email protected]" -To "[email protected]" -Subject "Test" -SmtpServer 127.0.0.1 -Body "Test"